Wednesday, November 29, 2006

Waste Not, Want Not

My dear sister Emily has a reputation for being frugal. If you ever go shopping with her, she will probably have a coupon you can use, no matter what store you are in. And she scores the most amazing deals (see $0.11 dog costume) and has the patience and forethought to buy things after a holiday and put them away for the following year. See what I mean? Frugal.

Me on the other hand, I'm cheap. Miserly even.

This is why I resisted scrapbooking for so long. I'm terrified that once I start buying the fancy papers and pens, there will be no stopping until I single handedly deforest the earth.

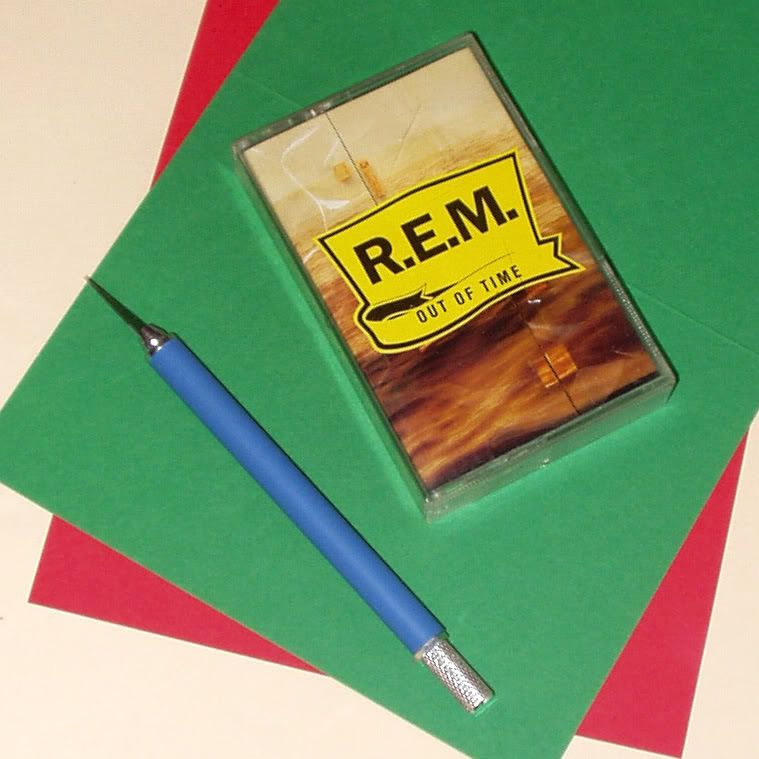
But I did make some cards this week that appealed to my penny-pinching ways. I used basic cardstock - you could fancy this up with some nicer papers or embellishments, but the idea is the same. Try to find two paper designs where the scraps from one card can be used on the second, and vice versa.


(If you didn't believe I was cheap before, please note the cassette tape that I have never replaced with a CD. Please also note that I was still buying cassette tapes well into the 90's because I didn't want to buy a new stereo or spend $3 extra for a CD... but I digress)

I traced the REM tape to cut windows out of my cards. The cheapness comes in when you switch around the colors and use the window scraps to make little trees and ornaments. I happened to have a sheet of yellow cardstock on hand for the stars and mini-ornaments. Otherwise, I probably would have cut these out of tin foil.


I have a star shaped hole punch, so I could make quick work of the tree toppers. Gluing two stars back to back on either side of the tree & window frame made this look a bit neater on the inside.


I made the ornaments using a circle punch for the little ones and by tracing a drinking glass for the big one. Oblong or fancy shaped ornaments would be cool, but then you need to find something else to trace.

The ornaments are actually glued in place, but I "hung" them using actual tree hooks cut to length and twisted around the ornament. A large sewing needle works for making the holes to hang them from if you are too cheap to buy a mini-punch (as I am). Silver or gold ornament hooks would have been more interesting, but I bought these green ones a few years ago and I'm not going to spend $0.59 on another package before I need to. I have a few left to hang, so I might try paper clips for the next batch. They're silver, right?
Monday, November 27, 2006

Stupid Gravity

Hope you had a great Thanksgiving!

I had a lovely and delicious dinner at my aunt's house in Michigan. For a bit of post-moonwalk, post-football, post-turkey entertainment, I brought a little craft project to kick off the holiday season.

Cat Morley had a cool idea for a light bulb Christmas ornament on her site. Conveniently, Meijers had a sale on both lightbulbs and glitter glue last week.

Pros: These looked awesome when they were finished - very sparkly and festive and cool looking. The materials were super cheap - it's just glitter glue, lightbulbs and a bit of picture wire to make them hang. This was appropriate for a wide range of ages - road tested for elementary school through my Dad (the wire was a bit sharp - that step may be best done by adults).

Neutral: The mess factor. The glue was water soluble - so easy to clean up mistakes and/or sparkly fingers. Probably less messy than your average paint project but you'll still need to put newspapers down to cover the table.

Cons: Stupid Gravity. Since the ornaments weren't flat they needed to be hung to dry. In most cases it seemed that the glue had slid around or dripped before they were fully dry. I suspect this will vary with the type of glue you use, but was a problem for us (note to self: read packaging for appropriate surfaces). The abstract designs still looked really cool, but the more specific shapes were blurred (sparkle camoflage was a success, holly leaves not so much). More enthusiastic (heavy/thick) glue applications actually dripped off of the ornaments and onto the floor. Fortunately the glue was water soluble, but I'm a little worried that my aunt's kitchen will be permanently sparkly.

Sorry, I don't have pictures to show you. But I would certainly recommend trying this at home - just, you know, put down some newspaper first.

Tuesday, November 21, 2006

Holiday crafting, part 5 - they're worth it

For the most part, my holiday crafting suggestions to date have been for quick and dirty projects you can knock out pretty quickly.

To recap, we've addressed coffee lovers, pirates (okay, that one was a bit of a joke), the masses, and puppies. We'll certainly have more quick and dirty suggestions as we go, but there are certainly people on your gift list worthy of a bit more effort.

Staring down the barrel of Thanksgiving and the official holiday season, there's probably time left for one - maybe two - more labor intensive projects. So choose your projects and recipients carefully. Think knitted hat not knitted sweater. Quilted tote not quilted bedspread. Mini-brag book not 12x12 scrapbook.

For my part, I thought my Grandma would be a good recipient and decided to make her a scarf. I'm using the Falling Water lace pattern that Bonnie Sennott was kind enough to post on her blog. I'm hoping that the red makes it Christmas-y and the laciness makes it appropriate for various seasons (at least that is what I am choosing to believe in light of Grandma's recent decision to spend the winter in Florida).


I'm not that far along, but I am confident I'll get it finished and blocked in time for Christmas. Hopefully without too much cursing or any all night knitting sessions, but if it comes to that, Grandma's worth it.

Have a great Thanksgiving everyone!

Tuesday, November 14, 2006

How cool is this?

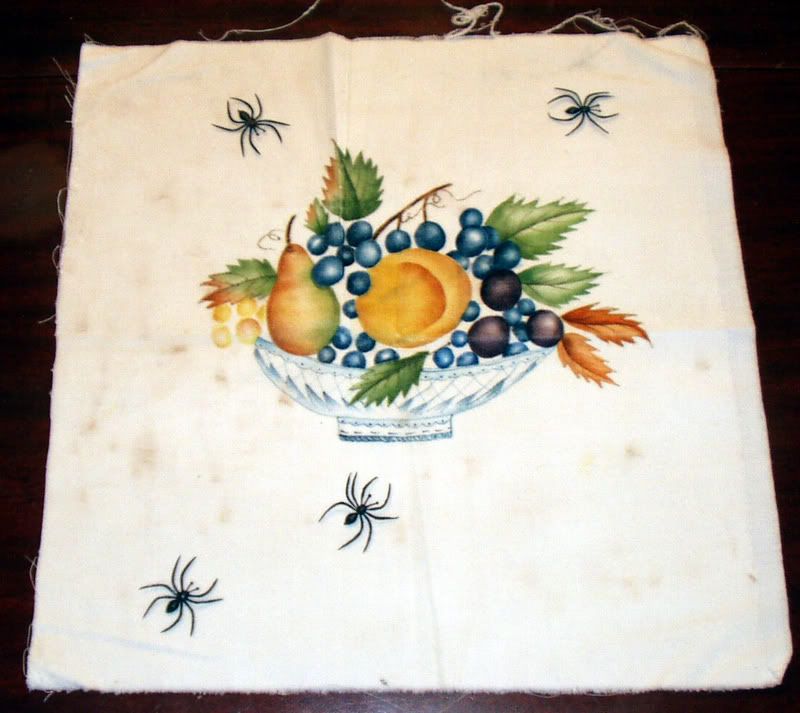
My cheap @$$ secret pal sent me the most beautiful present. The little plastic spiders aren't part of the picture - they were just in the envelope and I thought they were funny.


Check it out.

It is a Theorem Painting, which (I have learned) is a type of stenciling using oil paints on velvet that was very popular in New England around the 1830s. My CASP has tea stained this one to make it look aged and more like the 19th C originals.

I'm totally floored by how pretty it is. Magically, the colors she has chosen are exactly what I have used in my house. I can't wait to frame it and hang it in my kitchen.

In her note, she mentioned that she was pleased to see that I was stenciling. Um, I put sparkly birds and dinosaurs on t-shirts, she makes art. I feel a little bit like Chaka Khan just caught me singing in the shower.

But I love my new painting and have enjoyed surfing through some Theorem Painting websites this morning. It is well worth the google search to see both the antique and modern intepretations of this artform.

Monday, November 13, 2006

Holiday Crafting, part 4 - the Snugglers

So, how are those holiday crafts coming along?

This was initially just going to be my holiday crafting suggestion for the four-legged members of the family. My dog has a weird thing for fleece. She drags her little pink blanket all around the house like Linus from the Peanuts cartoons.

See?


Since she not only snuggles on top of her blanket, but kind of gnaws on it like a furry pacifier, the original model has gotten a little worn. But since fleece is cheap, washable, dryable and reasonably durable it meets all of my criteria for doggie indulgences. Maddie is crated during the day, so a little something soft and cuddly assuages my guilt about her sitting on a plastic tray all day. Anyway, I planned to make Maddie a new blanket for Christmas.

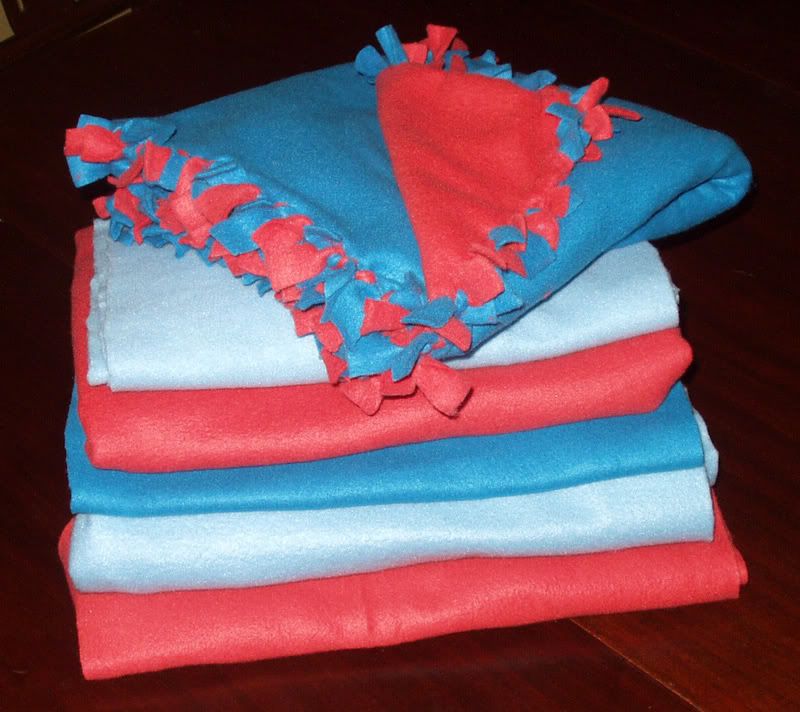
When I got to the fabric store, I discovered they were having a sale for Veteran's Day. I love sales. Since my cheap crafting project just got cheaper, I bought some extra fleece for the holiday toy and blanket drive on getcrafty to benefit Project Night Night. Project Night Night is a San Francisco based non-profit that provides security blankets, books and stuffed animals to homeless children staying in shelters across the country.

I was a security blanket kid. I fancy myself a pretty mature and independent adult, but my baby blanket still lives on the shelf in my closet. Although I haven't slept with it in years, I still can't bring myself to pack it away in a box or (God forbid) throw it out, so it stays on the shelf.

Anyway, I like security blankets. I think every kid should have one. And I really like the idea of giving kids something soft and snuggly to make staying in a strange bed in a strange place a bit less scary. So the mission of Project Night Night really appeals to me. Sending them a couple of blankets seems like the least I can do. (It looks like the sale at Hancock Fabrics is still going on, in case you were thinking the same thing)


I finished Maddie's blanket last night. She's a dog, so I went the quick and dirty no-sew route. I think I'll try to sew the ones for Project Night Night, but my sewing machine is about a million years old and may not be up to the task of thicker fabric. They may end up being no-sew blankets too.

Wednesday, November 08, 2006

Fetching-Inspired Hat

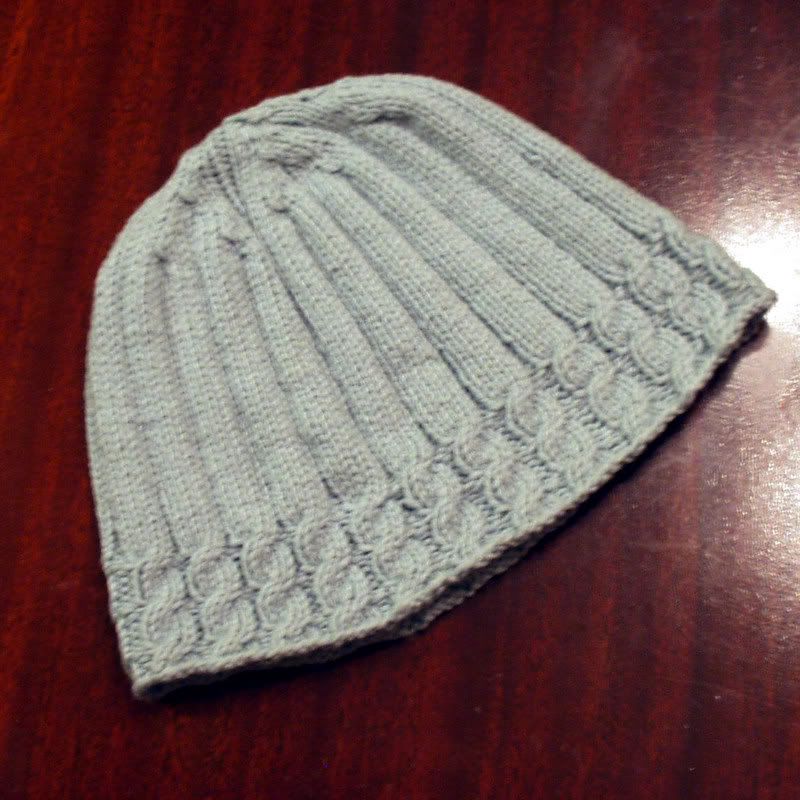
Okay, I finally finished my Fetching hat, which was more than a little bit ripped-off from Cheryl Niamath's pattern for Fetching fingerless gloves in the Summer 2006 knitty.

This should have been a super quick knit, but I ran into a few technical difficulties. Initially, I underestimated the size of my head. Frankly, it's amazing I don't tip over from the size of it. Then, my master plan for decreases at the top of the hat went a few rows too long and I ended up with a silly looking point at the top. What should have been a simple matter of ripping out the last 6 rows or so went terribly awry and I kept dropping stitches until I had pulled out way more than I had intended. I had to step away from it for a few days before I could fix my mistakes and move on.

But it's done now, and I'm pretty pleased with it.


The specs: This was knit on US size 6 double pointed needles and took just shy of a full skein of Rowan Calmer (in calmer). It is pretty light and stretchy and should be good for wearing to work or other short trips where you don't want hat hair but need to keep your ears warm. Extensive snow shoveling or other arctic adventures will call for a warmer hat.

The pattern: For a large women's hat that is roughly the size of an average men's hat (using the same gauge as for the gloves), cast on 120 stitches. Follow the pattern for Fetching gloves through the third cable round (only you should have 24 ribs instead of 9). Continue in 4x1 ribbing until hat measures 5.5 - 6 inches from cast on edge (depending on how ginormous your head is relative to mine or how far you like to pull your hat down around your ears).

First decrease:
Row 1: K4 P1 K4 P1 around (120 stitches - 24 ribs)
Row 2: K2 SSK K2TOG K3 P1 around
Row 3: K7 P1 around (96 stitches)
Row 4: K2 SL1 K2TOG PSSO K2 P1 around
Row 5: K5 P1 around (72 stitches)
Row 6: K1 K2TOG K2 P1 around
Row 7: K4 P1 around (60 stitches - 12 ribs)

Second decrease:
Repeat Rows 2-7 from first decrease (30 stitches - 6 ribs)

Third decrease:
Row 1: (K2 SSK K2TOG K3 P1) 3 times (24 stitches)
Row 2: (K2 SL1 K2TOG PSSO K3 P1) 3 times (21 stitches)
Row 3: (SL1 K2TOG PSSO SL1 K2TOG PSSO P1) 3 times (9 stitches)

Don't bind off. Use a needle to weave yarn through all of the loops and pull closed.

That's it. Hopefully the top looks more or less on purpose. I still have visions of making a pair of mittens to match, but we aren't there yet.

If you try this, or you have a better plan for the decreases, or I completely screwed up the math, let me know. Whatever you do, I hope your ears stay warm.

Sunday, November 05, 2006

I'm not worthy

Okay, I was totally shown up this week, not once, but twice. I'm woman enough to admit when I have been bested.

Last week, I posted about making Maddie's Halloween costume. Later that same week, Maddie got two more outfits in the mail. Let's see how they stacked up...

Original costume: dog as candy corn


Humiliation: 3.5 out of 5
The dog is clearly embarassed, though costume's potential to keep water-fearing dog dry during walk in drizzly weather cost us a point.

Craftiness: 4 out of 5
A solid performance with invented pattern and the superfluous cross stitch.

Bargain-hunting prowess: 4 out of 5
The materials for this costume cost $0.85 - would have scored a 4.5 if I'd used a half off coupon at Michael's.

Total Score: 11.5


Competitor #1: dog as dog wearing a shirt
My friend Liz embroidered a cute design on a little dog shirt for Maddie. Not exactly a Halloween costume, but I think we can open the competition up to include dog apparel of any kind.


Humiliation: 2 out of 5
Maddie picked at this for a couple of minutes when I first put it on her, but as you can see from the picture, she settled in pretty quickly with her bone and forgot all about the shirt.

Craftiness: 11 out of 5
I'm only scoring these out of 5, but this is out of control. This was actually Liz's first attempt at embroidery. My first attempt at anything doesn't look this good.


Bargain-hunting prowess: 2.5 out of 5
Contestant may have scored higher if she had submitted receipts. As is, we are speculating that this would be affordable to replicate based on Liz mentioning $0.25 embroidery floss on the phone.

Total Score: 15.5


Competitor #2: dog as six-legged cowboy
Emily sent Maddie a pre-made cowboy costume. It should be noted that she also sent a Dracula costume to Maddie's litter mate, Bailey. Maddie's costume came with a little hat too, but there aren't enough cookies in the world to make Maddie stand still with a hat on.


Humiliation: 9.5 out of 5
Contestant was awarded 4.5 points for Maddie and a 5 point bonus for humiliating Bailey as well. Judges deducted a half point since Maddie was a little too short for the costume, preventing her from venturing outside for public embarassment.

Craftiness: 2 out of 5
Although technically a store-bought costume, it was purchased a year in advance and came with a special Halloween beagle card. One point awarded for impressive display of planning and coordination. Also, the costume was shipped with a selection of Halloween treats and goodies for me. One point awarded because the judge totally accepts bribes.

Bargain-hunting prowess: 968 out of 5
Purchased on clearance the week after Halloween 2005, this costume was $0.11
What? How is that even possible? Eleven cents? You could buy this using only money boosted from the penny tray.


Total Score: 979.5


So there you have it readers, get yourselves to the clearance aisle. Only 360 days until Halloween! Just be warned that no matter what you pick out, it all ends the same way:


Beagle v. Candy Corn Grudge Match

(Beagle won by TKO in third round)